
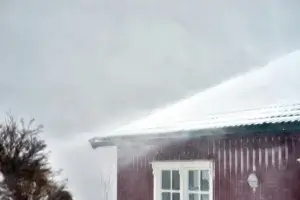
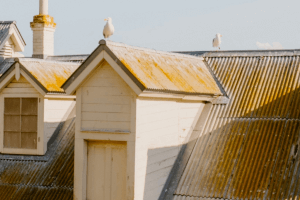
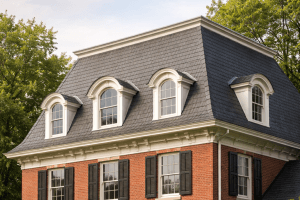
A dormer roof is a roofed structure that projects vertically beyond the plane of a pitched roof, creating extra headroom and usable floor space within an attic or upper story. Think of it as a small house protruding from your main roof, with its own vertical walls, mini-roof structure and usually one or more windows.
Its defining feature is the vertical wall which stands perpendicular to the slope of the main roof. This vertical wall supports a smaller roof sitting directly above it, creating that little projection you’ve seen on so many houses. The windows in the front wall are what make them so valuable – they bring natural light deep into areas that would otherwise be dark and cramped and improve air quality by providing better ventilation.
Historically dormers were functional, allowing homeowners to convert unused attic space into living rooms. Today they serve two purposes – area optimization and aesthetic enhancement. A well designed dormer can increase your house’s value and appeal while solving real space problems inside.
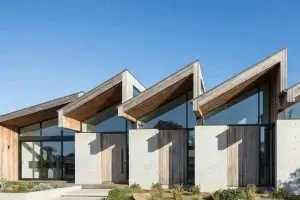
The beauty of dormers is their versatility. They work with any architectural style, from Victorian to modern. There are many different styles and types of dormer, such as gabled, hipped, shed, eyebrow, barrel dormers, wall dormers and false dormers, each with its own architectural and functional benefits.
Different Dormer Types
Not all dormers are created equal. There are different styles and different types to consider – such as gabled, hipped, shed, eyebrow and recessed– each with its own parts and design features to suit various architectural styles. The one you choose will depend on your home’s style, your budget and how much room you want to gain. Let’s look at the most common styles and what makes each one unique.
1. Gabled Dormers

The gabled dormer, or gable-fronted dormer, is the most common type and popular style, featuring a peaked roof with two sloping sides that meet at the dormer ridge to form that classic triangular shape. It’s also known as a dog house dormer due to its similarities with dog houses.
This style has several advantages. The triangular gabled end with two sides provides excellent drainage, preventing water and snow buildup that could lead to leaks. It looks great with traditional architectural styles and is a popular choice for Colonial, Victorian and Cape Cod homes.
From a practical point of view, gabled dormers provide good headroom directly beneath the peak, but the sloping sides from the single ridge mean you’ll lose some usable space at the edges. They’re moderately priced compared to other styles and have a timeless look that won’t date in twenty years. They are also the most compatible with two valley roofs!
2. Shed Dormers

If maximizing interior space is your top priority, shed dormers are worth considering. These have a single sloping roof that extends from the same direction of one of the main roof’s side at a shallower angle, creating a long rectangular projection. Shed dormers are popular in bungalows and Craftsman-style homes, often spanning the full width of the house to accommodate larger windows and enhance both aesthetic and functionality.
Shed dormers are space champions. Because the roof slopes in just one direction with minimal pitch, you get nearly full headroom across the entire dormer width. This makes them ideal for creating large master suites, multiple bedrooms or expansive bathrooms.
Cost-wise, shed dormers are great value. Their simpler construction means lower labor costs and the amount of room you gain makes the investment worthwhile. They also have a modern, clean-lined look that works well with contemporary home designs.
The one consideration? Shed dormers are a substantial visual feature. On some traditional homes they can look boxy or dominate the roofline. Design and proportion are key to maintaining your home’s architectural integrity.
3. Hipped Dormers
Hipped dormers are a more complex design, featuring roofs that slope on all sides – front, back and both ends.

Its specialty? This design excels at weather resistance. The sloping surfaces on all four sides shed rain and snow efficiently and the lack of vertical gable ends means fewer spots where wind-driven moisture can penetrate. If you live in an area with harsh weather conditions, hipped dormers offer better protection.
Aesthetically, hipped dormers have a finished look that elevates your home’s exterior. They look great on homes with existing hip roofs, creating visual harmony between the dormer and main structure.
The trade-off? Hipped dormers are more complex to build, so higher construction costs. You’ll also lose some interior space compared to shed dormers due to the multiple sloping surfaces creating angled walls.
4. Flat Roof Dormers

Flat roof dormers have the most modern, minimalist look. With a horizontal single flat plane roof surface, they create clean lines and a contemporary aesthetic.
They maximize ceiling height inside, giving you full headroom right to the back wall. This makes them ideal for creating dramatic, open areas with high ceilings – perfect for modern loft-style conversions.
However, they require careful waterproofing and drainage systems to handle heavy rainfall and prevent leaks, especially in areas with severe weather. That minimal slope means water doesn’t run off as quickly, so high-quality roofing membranes and regular maintenance are essential. They’re also more prone to leaks if not properly installed and maintained.
From a design point of view, flat dormers work well on contemporary homes but may look out of place on traditional architecture. Consider your home’s overall style before choosing this option.
5. Eyebrow Dormers

The eyebrow dormer is a distinctive feature with a curved roof, similar to an eyebrow, with no side walls, creating a gentle rounded top on the roof surface. Eyebrow dormers offer a custom look and a softer, more organic appearance than other styles. The catch? They provide limited extra space.
Because they’re smaller and less intrusive than barrel dormers, they typically cost less, though the curved surface still calls for skilled craftsmanship.
6. Recessed Dormers

Also known as inset dormers, these are set back into the roof, creating a deeper, inset window area. Recessed dormers bring in more natural light and views with their deeper windows and are perfect for homes with steep roofs or height restrictions, offering a modern architectural variation.
7. Barrel Dormers

Less common than the previous types, the Barrel Dormer features a curved roof that projects a rounded protrusion from the main roofline, similar to a half-barrel or tunnel shape laid on its side. Aside from its shape, its uniqueness lies in its significant depth and width that can accommodate one or more full-sized windows set into vertical side walls. Hence, the amount of headroom and usable floor space inside adds to its functionality, rather than just purely decorative. Its key difference with from the eyebrow dormer is its size and design, where it protrudes more than the other.
8. False Dormer

From its name, false dormers (also called blind dormers or dummy dormers) have no functional purpose unlike the other types. They are purely decorative elements mimicking the appearance of dormers, but usually matching the house’s windows, without actually penetrating into the attic or adding an interior area. Homeowners choose them mainly to enhance curb appeal, break up large expanses of roof, add architectural character to plain rooflines, or create visual symmetry when a functional dormer exists on one side but isn’t needed or feasible on the other.
Benefits of Dormer Roofs
Why should you get a Dormer Roof? Besides optimizing the very top of your home, here’s what you’ll get:
More Living Space: The most obvious benefit – they turn unusable areas into functional rooms – such as a comfortable bedroom, office or bathroom with adequate headroom where you need it most.
Natural Light: Windows in vertical dormer walls bring in natural light into areas that would otherwise require artificial lighting even during the day. This makes attic conversions feel bright, welcoming and connected to the outdoors rather than dark and oppressive.
Better Ventilation: Those windows in vertical dormer walls provide cross-ventilation, helping to regulate temperature and air quality in your upper floor. This is especially valuable in summer when heat rises and accumulates.
More Curb Appeal: Well-designed dormers add architectural interest and depth to your roofline. They break up large expanses, create visual rhythm and often become a defining feature that gives your home character.
Increased Value: The combination of added square footage, functionality and aesthetics usually translates to real value. Homeowners often see a 5-10% increase in value from a quality dormer addition.
Energy Efficiency: includes insulation upgrades that can improve your home’s overall energy efficiency. Plus, natural light reduces electricity usage during the day.
Flexible Living: As your family’s needs change, these extra areas create more room options. It might start as a nursery, transition to a kid’s bedroom, become a home office when the kids leave and eventually serve as a guestroom.
Dormer Roofs Costs and Factors
Let’s talk numbers. How much will installing one cost?
On average, dormer roof installations range from $10,000 to $30,000, with most homeowners spending around $15,000 to $25,000 for a standard project. However, this range can vary greatly based on several key factors.
Size: This is the biggest cost driver. A small dormer for a bathroom might cost $10,000-$15,000, while a large shed dormer could cost $30,000 or more and even up to $50,000 for extensive projects.
Type: Gabled and shed dormers are generally more affordable due to simpler construction. Hip dormers and eyebrow dormers (a specialized curved style) cost more due to their complexity.
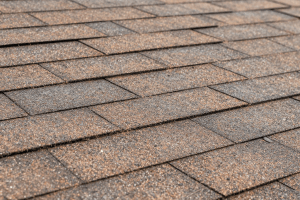
Materials: Your choice of materials for elements like roof covering, siding, windows and trim impacts costs significantly. Standard asphalt shingles and vinyl siding keep costs down, while slate roofing, copper flashing and custom millwork push budgets higher.
Structural Modifications: If your existing roof structure needs to be reinforced to support the dormer—which is often the case—expect additional costs. Some homes require beam additions, floor joist reinforcement or other structural upgrades.
Interior Finishing: The exterior dormer is just the beginning. Interior finishing (drywall, insulation, flooring, electrical, HVAC extensions) adds a lot to the total cost.
Location: Labor and material costs vary greatly by region. Urban areas with higher cost of living generally mean higher construction costs. Plus, difficult access or steep pitches add to labor requirements and costs.
Permits and Design: Building permits are $500-$2,000 depending on your location. If you hire an architect for custom designs, add another $1,500-$5,000 to your budget.
To keep costs under control, get multiple detailed quotes from licensed contractors, prioritize what matters most to you and consider phasing interior finishing work if budget is tight. The structural and weatherproofing work must be done right the first time, but interior finishes can sometimes be done in stages.
Measuring and Calculating Dimensions for Different Types of Dormers
Getting the dimensions right is one of the most important parts of any dormer roof construction project, regardless of dormer type. Accurate measurements ensure your new dormer fits with your existing roof and gives you the extra space you need inside your house. It starts by determining where the dormer will go and which type is best for you—whether it’s a shed dormer with a single roof plane at a shallower angle or a gabled dormer with two walls and a triangular shape.
For a shed dormer, you’ll need to measure the length and width of the area you want to add, taking into account the angle of the new roof plane compared to the main roof. This design is great for maximizing space and adding visual interest to your home’s exterior. For a gabled dormer, you’ll measure the base width and the height to create the triangle, making sure the new structure aligns with the slope and shape of your main roof.
Don’t forget to factor in the size and placement of the dormer window as this will affect the look from the outside and the amount of natural light inside. The window should be proportional to the dormer and the rest of your home’s design, providing the right balance of function and value. By measuring and calculating every dimension—roof pitch, window size and the extra space you want inside—you’ll have a smooth construction process while adding value and character to your home.
Materials Needed and Construction Method
Choosing the right materials and construction methods is crucial to building a dormer roof that looks great and lasts. The most common materials are wood, metal and vinyl, each with its own benefits depending on your home’s style and your personal taste. Wood is a classic choice, valued for its durability and ability to be stained or painted to match the rest of your home’s exterior. Metal is perfect for modern look and low maintenance durability, while vinyl is a cost-effective, weather-resistant option that can be designed to fit with many home styles.
The construction process involves a combination of framing, roofing and finishing elements. This means building a sturdy frame with rafters or trusses, installing roofing felt and shingles or metal panels and finishing with siding and trim that matches or enhances your home’s existing design. Some dormer styles like hip or eyebrow dormers require more complex framing and additional support to ensure structural integrity.
By using high-quality materials and proven construction methods, you can ensure your dormer roof will give you lasting value, beauty and protection for your home. Working with professionals who know how to match new elements to the rest of your house is key to a seamless, attractive result that adds to the function and value of your property.
Dormer Roof Proper Installation Process
Understanding the installation process helps you know what to expect and ensures you can communicate with contractors. The process to install the components involves planning, framing, waterproofing and finishing steps to ensure a durable and watertight result. Here’s how professional dormer installation works.
Step 1: Planning and Permits
Every dormer project starts with planning. This phase involves several critical steps that set the foundation for everything that follows.
First, you’ll work with a designer or architect to create detailed plans that match your home’s existing architecture. The dormer’s size, style and placement must harmonize with your roofline, be proportional and meet your functional needs.
Next comes permits a. Building codes govern dormer construction strictly, from structural requirements to fire safety, egress windows (for bedrooms) and energy efficiency standards. Your contractor should handle permit applications but expect a 2-6 week review process from your local building department. Also, always inform homeowners’ association regarding your plan to install a dormer as you will likely need their approval as well.
During planning, you’ll also need to verify your existing roof structure can support the additional weight. This often requires an inspection by a structural engineer to identify any necessary reinforcements before work begins.
Don’t skip the design matching step. Your dormer should use roofing materials, siding, trim, windows, and architectural details that match or complement your existing home. Mismatched materials create visual discord that actually decreases property value.
Step 2: Framing and Structural Support
Once permits are in hand, construction begins with what’s essentially a surgery on your roof. This is delicate, precision work that requires experienced professionals.
The contractor starts by removing roofing materials and cutting an opening in your existing roof structure. This opening must be precisely sized and positioned according to your approved plans.
Next comes framing—building the vertical walls and roof structure of the dormer itself. Dormers can be framed on the ground to minimize the time the roof is open to the elements during installation. This framework must integrate with your main roof’s structure, transferring loads properly to avoid stress points that could cause problems down the road.
Headers and support beams are installed to carry the loads around the new opening. Depending on your home’s structure, this might involve adding new rafters, reinforcing existing ones or installing engineered beams. Dormer overhangs may be supported by corbels or other architectural features to provide additional stability and enhance the appearance.
Throughout this process, temporary weather protection is essential. Professional contractors will tarp the work area daily and watch weather forecasts to avoid exposing your home’s interior to the elements.
This phase takes 3-7 days depending on the size and complexity. It’s loud and dusty work so prepare accordingly if you’re living in the home during construction.
Step 3: Roofing, Windows and Finishing
Once the structure is complete, attention turns to weatherproofing and finishing. This phase turns the rough framing into a fully functional, beautiful dormer.
Roofing comes first. The contractor installs sheathing (usually plywood or OSB), then underlayment and your chosen roofing material. When installing shingles and flashing around the dormer, proper installation is key—this includes using ice and water protection and step flashing to prevent leaks. The dormer roof pitch should intersect the existing roof at least 8 inches below the main roof ridge to avoid flashing and aesthetic problems. The critical element here is step flashing—metal pieces that seal the joints where the dormer meets the main roof. All flashing and shingles must be cut to fit around the dormer edges and the last row of shingles under the dormer must be covered to maintain the roof’s pattern and ensure weatherproofing. Proper shingle exposure is important for a consistent look and water protection. Sealing all edges is crucial to prevent water infiltration. A little extra effort and attention to detail during installation can make a big difference in the quality and water tightness of the dormer.
Windows are next, with careful attention to flashing and weather sealing around all openings. For bedrooms, egress requirements may dictate minimum window sizes for emergency escape.
Exterior siding follows, matching your home’s existing siding as closely as possible. Trim work and paint complete the exterior, making the dormer look like it was always part of your home rather than an afterthought.
Inside, insulation is installed to current energy code standards—usually R-30 or higher in most areas. Drywall, electrical work, HVAC extensions and finish work turn the space into a usable room.
The entire installation process takes 1-3 weeks for simple projects, 4-6 weeks for complex or large dormers.
Dormer Roof Design Ideas and Tips
Getting the design right makes all the difference between a dormer that enhances your home and one that looks awkward or out of place. Here are the key design principles to follow.
Proportion Matters: The dormer should be in proportion to your main roof. Too small and it looks like an afterthought. Too large and it overwhelms the home’s original architecture. A good rule of thumb: dormers should not be more than half the width of the roof face they’re on.
Placement: Position dormers symmetrically when possible, or at least intentionally. If you’re adding multiple dormers, consistent spacing is key. Consider how the dormer will look from the street—this is your curb appeal talking.
Match the Style: Gabled dormers work well with traditional homes. Flared gabled dormers, in particular, mimic the flared eaves of main roofs or porches, providing both shading and decorative detail. Shed dormers work with both traditional and contemporary styles depending on the proportions. Flat dormers belong on modern homes. Fighting your home’s architectural DNA never works well.
Material Consistency: Use roofing materials that match your main roof exactly or create intentional contrast with high-quality materials (like standing seam metal on a shingle roof). Same with siding—match to your home’s existing exterior unless you’re creating a design accent.
Window Selection: The style, proportions and mullion patterns should match your home’s existing windows. The dormer window is a focal point so choose your windows wisely.
Roofline Coordination: The dormer’s roof pitch should match your main roof pitch. Same pitch creates visual harmony, though slightly shallower dormer pitches can work too. Avoid pitches that are dramatically steeper than your main roof—they look weird.
Historical Styles: Certain dormer styles like eyebrow and pedimented dormers add historical character and elegance to your home. They resonate with classic architecture and its timeless look.
Don’t Forget Scale: If you’re working with a smaller home, keep dormers modest. Larger homes can handle bigger ones without looking out of balance.
Dormer Roof Problems and Maintenance
Dormers also need to be maintained, so they require proper maintenance and occasional repairs. Knowing common issues helps you catch problems early before they become expensive disasters.
Flashing Leaks: The most common problem is failed flashing where the dormer meets the main roof. Water seeps into these joints and rots the roof sheathing and framing. Prevention is key with proper installation initially and inspection of flashing every few years. Look for rust, separation or damaged sealant. Keep shingles, flashing and roof edges straight for proper water drainage and no water infiltration.
Ice Damming: Dormers create complex roof valleys where snow and ice accumulates. If your attic insulation and ventilation isn’t adequate, warm air melts snow that refreezes at roof edges creating ice dams. These push water under shingles and cause leaks. Proper design and installation of these two prevent this problem.
Wood Rot: Anywhere water can get in—around windows, cracked walls, in siding joints or at trim boards—moisture can cause wood rot. Annual inspections should check these vulnerable spots. Address rot immediately by replacing affected wood and fixing the moisture source.
Window Seal Failure: Dormer windows face weather directly and can develop seal failures, causing condensation between panes or drafts. Inspect these windows annually and replace failing units promptly.
Gutter Issues: With ones that have gutters (not all do), keep them clear of debris. Clogged gutters overflow and send water into walls and cause rot.
Ventilation Problems: Your attic’s ventilation dynamics change when installing these dormers. Lack thereof causes heat buildup in summer and moisture problems in winter, both can damage your roof structure.
Prevention and Maintenance Tips: Inspect your dormer biannually—spring and fall are best. Check flashing, caulking, paint condition and look for any signs of water damage inside. Keep gutters clean. Maintain good attic ventilation and insulation. Address small problems immediately before they become big issues.
Budget to repaint trim every 5-7 years and expect to replace roofing materials when you replace your main roof. With proper maintenance a well built dormer should last as long as your main roof structure—50 years or more.
Ready to Add Dormer Roofs? Contact us!
Turning your attic into a beautiful functional space is closer than you think. Our experienced contractors understand the importance of structural integration, weatherproofing and design harmony, handling everything from initial design consultation to permit acquisition, construction and final finishing touches. We stand behind our work and are proud of the versatility our residential roofing services in OK offer; along with comprehensive warranties that give you peace of mind for years to come.
Decided on getting a dormer? Contact us today at (405) 703-3843 or sales@maupinroofing.com for a free no obligation quote. Don’t waste your house’s potential—let’s get started and give you’ve been dreaming about.
Roof Repair: Hail Damage in Oklahoma City
Hail storms can be devastating, and hail can cause substantial damage to homes, vehicles, and businesses, leading to costly repairs. This article focuses on roof
Sawtooth Roofs: A Modern Look for Contemporary Homes
Lorem ipsum dolor sit amet, consectetur adipiscing elit. Ut elit tellus, lu Walk past a century-old textile factory in New England, and you will likely
Dormer Roofs: Adding Space and Character to Your Home
A dormer roof is a roofed structure that projects vertically beyond the plane of a pitched roof, creating extra headroom and usable floor space within
What Is a Saltbox Roof? | Design Features, Benefits, and Drawbacks
Saltbox roofs aren’t the flashiest trend on the block, but they’ve quietly stood the test of time. Originating in England and brought to the US
Mansard Roofs: Elegant Architecture for Modern and Historic Homes
There’s beauty in function, and mansard roofs’ elegant architecture for modern and historic homes proves it. Designed to maximize attic space and make your home
Asphalt Shingles for Residential Roofs: Why They’re Ideal
There’s no shortage of stylish roofing materials out there, but not all of them are built for wind, rain, or heat. Asphalt shingles for residential